Introduction
If you already understand why fixed asset verification matters, the hard part starts when the job spans 8 plants, 40 branches, 200 warehouses, or a campus estate with hundreds of rooms. This guide shows how to run a physical asset verification process across multiple locations without losing control of scope, evidence quality, or reconciliation speed.
A physical asset verification process for a multi-location enterprise is a site-by-site workflow that starts with a clean register, uses the right counting method for each asset class, freezes uncontrolled moves during count windows, captures standard evidence at every site, and closes discrepancies back into the register, ERP, or CMMS through named owners. A well-structured approach to asset verification ensures these steps are followed consistently across all sites and integrated into ongoing control practices.
In this guide, you’ll learn:
- How to verify assets across multiple locations and make sure your physical inventory, register, and system records all match.
- Why staying consistent matters, especially when assets move between teams, branches, or departments.
- Exactly how to run the process, step by step—from planning and counting to capturing evidence, resolving exceptions, and updating records.
- Ways to simplify future audits by clarifying ownership, applying smart controls, and using the right software tools.
TL;DR
- Multi-location verification fails less often in fieldwork than in planning, movement control, and exception closure.
- The best process uses the same scope rules, location coding, evidence rules, and discrepancy codes at every site.
- Large enterprises usually need a hybrid counting model rather than one blanket method for every asset class.
- A good cycle ends with approved updates, site-wise reports, and a stronger baseline for the next round.
- This page focuses on execution. For the broader definition, controls, and audit-readiness context, route readers to the pillar page.
Physical asset verification process at a glance
Here is the operating model this page should own:
- Define scope by site, asset class, and risk.
- Clean the baseline register before fieldwork starts.
- Choose the counting method and build the site route plan.
- Freeze non-essential asset movement during the count window.
- Execute field verification with standard evidence rules.
- Triage discrepancies and route approvals by the owner.
- Publish site-wise reports and close the cycle back into systems.
To ensure each phase delivers a clear, measurable outcome, the following “done when” criteria define what completion looks like before moving to the next step:
Phase |
Goal |
Done when |
|---|---|---|
| Scope | One common rulebook for all sites | Sites, asset classes, thresholds, and exclusions are approved |
| Baseline cleanup | A usable verification population | Duplicates, missing identifiers, and bad locations are corrected |
| Planning | Efficient field execution | Method, zones, teams, cutoff windows, and daily QA are scheduled |
| Fieldwork | Consistent proof from every site | Required evidence is captured, and daily exceptions are reviewed |
| Triage | Controlled exception handling | Every discrepancy has a code, owner, target date, and next action |
| Reconciliation | Approved data correction | Finance, ops, and site owners approve, register, and process changes |
| Closeout | A reusable output set | Site reports, dashboards, action logs, and sign-offs are complete |

What changes when physical asset verification spans multiple locations?
The logic of verification does not change across sites. However, the risk of inconsistency does. One site may use building-floor-room codes, another may use cost centers, and a third may rely on department names. Some sites may allow daytime access; others require shutdown windows, weekend access, or escort rules. As a result, the process becomes a coordination problem as much as a counting problem.
That is why generic four-step guides are not enough for enterprise readers. Current results usually explain plan, inspect, reconcile, and report. They rarely explain how to keep 20 site teams working to the same evidence standard or how to stop transfers from creating false “not found” exceptions mid-cycle.
Inputs required before fieldwork starts
Before any team goes on-site, assemble one controlled baseline:
- Prepare the fixed asset register or asset master, so the team works from a single source of truth.
- Compile the site master and location hierarchy, so everyone understands how sites connect.
- Collect recent addition, disposal, and transfer logs, so you capture the latest changes.
- Map asset classes and define value thresholds, so the team prioritizes the right assets.
- Align custodian and department details, so accountability stays clear.
- Standardize the tag policy and identifier format, so teams apply consistent labeling.
- Define exception rules for embedded, shared, or hard-to-tag assets, so teams handle special cases correctly.
- Set an approval matrix for accounting and operational changes, so you can control updates properly.
Output documents you should expect
At the end of the cycle, the process should produce more than one overall percentage. A useful multi-location closeout includes:
- Generate a site-level verification summary, so each location sees its results clearly.
- Create a discrepancy log by category, so you group issues in a structured way.
- Maintain an unresolved exception tracker, so teams focus on open items first.
- Prepare location-level reports when needed, so stakeholders get detailed insights.
- List clear action owners, so accountability stays defined.
- Build a consolidated management dashboard so leadership can review all locations together.
- Complete a formal closeout and hand off updates to ERP or CMMS, so the system reflects the verified data.
Recent multi-location guidance on the market emphasizes the same reporting pattern: site-level summaries, lists of missing, damaged, obsolete, or untagged assets, reconciliation with finance records, investigation findings, corrective actions, and management dashboards.
Step-by-Step Physical Asset Verification Process

→ Step 1 – Define scope, objectives, and asset classes
Start by deciding what success looks like. In different scenarios, the objective can vary. For one company, the focus may be on supporting the year-end audit, while for another, it may involve rebuilding the register ahead of an ERP migration. Meanwhile, in other cases, the priority could be to improve visibility across hospitals, campuses, or plants where asset ownership remains inconsistent.
Value thresholds and risk tiers
Do not treat every asset the same. Segment by:
-
- Value
- Mobility
- Fraud or loss exposure
- Operational criticality
- Audit sensitivity
- Location complexity
A laptop pool, a lab instrument, a forklift, and a chiller should not all follow the same verification intensity.
Taggable, verify-only, and exception assets
Classify each asset group before fieldwork:
-
- Taggable assets: Normal barcode, QR, RFID, or BLE verification.
- Verify-only assets: Can be physically confirmed but may not hold a standard tag.
- Exception-controlled assets: Need alternative evidence or special treatment.
This classification saves time later because teams stop arguing in the field about whether a specific asset “should count.”
→ Step 2 – Clean the baseline register
A messy register creates messy fieldwork. Most multi-location programs waste more time fixing bad data than counting assets.
Duplicate detection
Find and resolve:
-
- Duplicate asset IDs.
- Same serial number on multiple lines.
- Multiple tags on one asset.
- Retired assets are still marked as active.
- Site transfers are not reflected in the register.
Missing fields to fix before fieldwork
At a minimum, repair these fields before dispatching teams:
-
- Asset description.
- Unique identifier.
- Asset class.
- Location.
- Cost center or department.
- Status.
- Custodian where relevant.
If field teams must guess location codes or site names, your results will fragment immediately.
→ Step 3 – Plan the field model
This is where multi-location rollouts either become smooth or chaotic.
Book-to-floor vs floor-to-book vs hybrid
AssetCues’ current methods guide separates Wall-to-Wall from File-to-Floor. Wall-to-Wall starts from scratch and rebuilds the population when records are unreliable. File-to-Floor starts with the register and validates recorded assets. The same guide notes that many organizations combine the two in a hybrid model. That is the right mental model for enterprise process design.
Method |
Best when |
Main strength |
Main risk |
|---|---|---|---|
| Book-to-floor / File-to-floor | The register is reasonably trusted | Fast, controlled, audit-friendly | Can miss unrecorded assets if used alone |
| Floor-to-book | Local purchases or poor discipline are common | Finds off-book assets and tag gaps | Slower and more disruptive |
| Wall-to-wall | Baseline is weak or outdated | Full reset of the population | Highest effort |
| Hybrid | Enterprise rollout across mixed sites | Balances speed and discovery | Needs clear rules per site and class |
Terms used in this guide
-
- Book-to-floor: Start from the register and sight listed assets physically.
- Floor-to-book: Start from what you find on-site and trace it back to records.
- Wall-to-wall: A full-sweep floor-to-book exercise used when the baseline is weak.
- Cutoff window: A defined period when non-essential moves stop.
- Site batch: A pre-defined zone, building, floor, or route assigned to one team.
Location batching and route planning
Do not send teams into sites with a flat asset list. Break the work into:
-
- Break work by building or plant, so teams focus on manageable areas first.
- Organize by floor or zone, ensuring thorough coverage within each section.
- Group assets by aisle, dock, line, or room cluster, so teams follow a logical path.
- Plan routes by department or custodian, so ownership and accountability stay clear.
- Separate high-value and bulk asset routes, so teams prioritize critical items efficiently.
A university may run floor-to-book by building and then book-to-floor on high-value lab equipment. A logistics company may batch counts by aisle and dock zone. A pharma plant may verify clean-room assets during a weekend shutdown window.
Cutoff controls to limit asset movement during count
This is the part most articles skip. Yet it is the part that protects data quality.
Use:
-
- Define clear count windows, so teams verify assets within a controlled timeframe.
- Freeze non-essential transfers, preventing unnecessary changes during the count.
- Require sign-off for urgent moves, so every exception stays authorized.
- Maintain daily movement logs, so all asset activity is tracked in real time.
- Obtain local custodian acknowledgments to confirm on-site ownership.
- Escalate issues for blocked or inaccessible zones, so teams resolve obstacles quickly.
If teams continue moving assets between sites during the count, “not found” exceptions stop meaning anything.
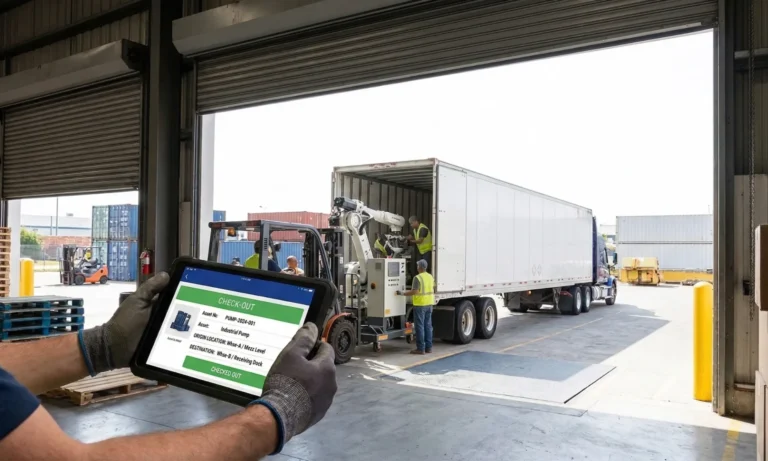
→ Step 4 – Execute on-site verification
AssetCues’ software workflow is a good model for this phase: import the register, assign audit tasks to field teams, verify assets in a mobile app, review discrepancies, and sync final data back into ERP. For enterprises managing multiple locations, automated asset verification streamlines these steps, offering geo-tagged proof, photo capture, audit logs, multi-technology support, and ERP integration to ensure accurate, timely, and consistent verification across all sites.
Barcode, QR, RFID, serial, and photo capture
Use the simplest reliable evidence mix for each class:
-
- Barcode or QR for broad coverage.
- RFID where speed or density matters.
- Serial capture when tags are missing or legacy assets remain.
- Photo proof where condition or identity matters.
- Geolocation where remote validation or site proof matters.
Condition and custodian capture
Do not stop at “found.” Record the fields that make the result operationally useful:
-
- Record the exact location, so teams know precisely where each asset sits.
- Capture the asset condition, ensuring you track operational status accurately.
- Note the custodian or department, so accountability remains clear.
- Mark whether the asset is in use, idle, damaged, or obsolete, so teams understand its usability.
- Include the verifier’s name, so you know who performed the check.
- Log the date and time, ensuring the verification is traceable.
- Apply an exception code if relevant, so teams can flag issues immediately.
Field-team checklist
Every team should follow the same micro-rules:
-
- Confirm the asset ID first.
- Capture the exact location, not just the site name.
- Apply one discrepancy code per issue type.
- Record condition using controlled values.
- Photograph only where the rulebook requires it.
- Escalate blocked access the same day.
- Complete daily QA before leaving the site.
→ Step 5 – Triage exceptions
Verification does not create value until exceptions are classified and routed.
Sample discrepancy code legend
Code |
Meaning |
Typical next action |
|---|---|---|
| NF | Not found | Recheck route, review transfers, escalate investigation |
| UA | Unrecorded asset found | Validate source, capitalization, and ownership |
| WL | Wrong location | Update location and review movement discipline |
| WC | Wrong cost center or custodian | Correct assignment and confirm accountability |
| DT | Duplicate tag or duplicate record | Merge records and revalidate history |
| DM | Damaged, obsolete, or idle | Review impairment, redeployment, or disposal |
| AX | Exception-controlled asset | Apply the alternative evidence and approval rule |
Not found
Treat “not found” as a workflow, not a final answer. Recheck recent transfers, service records, repair logs, and alternate rooms before escalating to finance.
Found, but not in books
This usually signals missed capitalization, local purchase leakage, incomplete onboarding, or a prior wall-to-wall never closed properly.
Wrong location or cost center
These are common in multi-location environments because departments move faster than master data. Fixing them often has more control value than finding one missing asset.
→ Step 6 – Reconcile and approve updates
This is where finance and operations reconnect.
Accounting actions
Finance should review:
-
- Review additions that need recognition, so accounting reflects all new assets.
- Check disposals or write-offs, ensuring removed assets no longer appear in records.
- Verify location and cost-center changes, so ownership and responsibility stay accurate.
- Examine condition findings so you can address potential impairment or replacement planning.
- Identify duplicate or stale records, so the register stays clean and reliable.
Operational actions
Operations, facilities, and site custodians should review:
-
- Movement discipline.
- Room or zone labeling.
- Handover failures.
- Retagging needs.
- Damaged or unused assets.
- Blocked-access patterns.
Define a closeout SLA before fieldwork starts. For example, site review within a few working days, finance approval within the following week, and final ERP/CMMS update once all sign-offs are complete.
→ Step 7 – Publish reports and close the cycle
A strong multi-location cycle ends with reusable outputs, not just a single count certificate.
At a minimum, issue:
-
- Issue a site-wise status report, so each location’s progress and results are clear.
- Build a consolidated discrepancy dashboard, so leadership sees all issues in one place.
- Maintain an unresolved exception report, so teams know which items still need attention.
- Track action owners, so accountability stays assigned and visible.
- Complete a final approval log, so the cycle receives formal sign-off.
- Handoff cleaned data to ERP or CMMS, so systems reflect the verified and updated records.
AssetCues’ services page positions its delivery in exactly this direction: structured data for ERP and CMMS integration, audit-ready documentation, multi-site rollout capability, and use cases such as annual verification for financial close, baseline creation, and compliance support.
The four control gates that stop multi-location verification from failing
This is the original contribution this article should own.
-
-
Data gate
First, ensure the baseline is clean and reliable before starting any fieldwork. -
Movement gate
During active count windows, prevent any uncontrolled transfers to maintain accuracy. -
Evidence gate
Additionally, standardize capture rules so sites do not create their own methods for location, condition, photos, or discrepancy coding. -
Closeout gate
Finally, confirm that all approved corrections are updated in the register and systems before declaring success.
-
Most failed rollouts break at one of these four gates, not because the organization forgot how to count.
How should the process adapt in the USA, India, the UK, and South Africa?
USA: Site-level evidence should support ICFR
For US-facing finance teams, multi-location verification should produce evidence that management can stand behind. SEC rules require management’s annual report on internal control over financial reporting to include management responsibility, the framework used to evaluate effectiveness, management’s assessment, and the auditor attestation statement, where applicable. For fixed assets that are material, site-level verification evidence strengthens that control story.
India: Document “reasonable intervals” and how discrepancies were dealt with
For India-facing readers, the process should explicitly show periodicity and book treatment. ICAI-linked materials on CARO reporting reiterate that auditors report whether PPE has been physically verified by management at “reasonable intervals” and whether material discrepancies were properly dealt with in the books of account. That means a multi-location workflow should preserve interval logic, discrepancy treatment, and sign-off discipline.
United Kingdom: Plan the workflow as a control framework, not a count event
For UK readers, the process should read like control evidence, not just operational activity. The FRC states that the 2024 UK Corporate Governance Code applies from 1 January 2025, with Provision 29 applying from 1 January 2026, and that Provision 29 asks boards to make a declaration on the effectiveness of their material internal controls. That raises the bar for how multi-site estates document verification coverage, exceptions, and remediation.
South Africa: Room lists, location reports, and missing-asset schedules matter
For South Africa, the content should reflect what public-sector and public-entity buyers already ask for. Recent official tenders and policies call for asset verification reports with description, location, and condition; asset location reports per office; reports on damaged, redundant, or missing assets; room inventory lists visible and signed; authorized asset movement forms; and, in some cases, GPS coordinates or GRAP-aligned master data updates. A South Africa-ready process should therefore plan for those outputs from day one.
Common failure modes in multi-location rollouts

- One policy, ten local interpretations
The central team defines the scope, but each site uses a different location logic. - No movement control during fieldwork
Teams continue shifting assets and then treat false exceptions as real findings. - Route plans built from bad master data
Teams waste hours chasing outdated rooms and retired assets. - Evidence standards that change by site
One site records room numbers; another records only building names. - Exception logs with no owner
Findings stay open because nobody owns the next action. - Closeout that stops at reporting
The dashboard looks finished, but ERP, CMMS, and the register remain wrong. - Trying to scale spreadsheets too far
Small rollouts may manage with spreadsheets. Large multi-site programs rarely close cleanly without workflow discipline, better tooling, or both.
Key Takeaways
- Multi-location asset verification succeeds when scope, baseline data, and counting rules are standardized across all sites.
- Field teams must capture usable evidence—asset ID, exact location, condition, custodian, photos, and geolocation to ensure consistency and audit readiness.
- Discrepancies must be triaged and resolved with clear owners, codes, and deadlines before closing the cycle.
- Reconciliation and approvals by finance, operations, and site custodians complete the cycle, updating ERP or CMMS for accurate records.
- Success relies on four control gates: clean baseline, controlled asset movement, standardized evidence, and proper closeout, with country-specific compliance considerations as needed.
Conclusion
A physical asset verification process for a multi-location enterprise is not just a longer version of a standard asset count. It is a controlled operating model. The winners are not the teams that count the fastest. They are the teams that standardize scope, control movement, capture usable evidence, close discrepancies quickly, and leave the register stronger than they found it.
That naturally leads to the next step—exploring how to actually implement this in practice. The software side takes you from register import to mobile verification, discrepancy resolution, and seamless ERP sync, while the services side focuses on structured data handover, audit-ready documentation, and reliable support for complex, multi-site execution.
FAQs
Q1: What is the first step in a physical asset verification process?
Ans: The first step is to define the scope and clean the baseline register. If the starting data is weak, fieldwork creates avoidable noise instead of usable findings.
Q2: What is the difference between book-to-floor and floor-to-book?
Ans: Book-to-floor starts from the register and checks whether listed assets exist physically. Floor-to-book starts from what is found on-site and checks whether it is recorded.
Q3: Which method is better for multi-location companies?
Ans: Most large enterprises use a hybrid approach. Book-to-floor works well for high-value recorded assets, while floor-to-book helps uncover unrecorded additions and local data drift.
Q4: How do you reduce asset movement during verification?
Ans: Use count windows, transfer freezes, urgent-move approvals, and local custodian sign-offs. These controls reduce false “not found” exceptions caused by mid-cycle movement.
Q5: What details should field teams capture?
Ans: Field teams should capture the asset identifier, exact location, condition, verifier, date, and exception status. Photos and geolocation help when remote review or audit support matters.
Q6: How long does a verification cycle take?
Ans: The answer depends on site count, asset density, and register quality. In practice, teams that clean the baseline and plan routes well usually finish faster and close cleaner.
Q7: Should low-value assets be included?
Ans: Include them only when policy, risk, or operational need justifies the effort. Many enterprises apply thresholds, sampling logic, or lighter controls for low-risk categories.


